Get Better Sound Quality at Home


- Roland Boyden
- |
- Aug 17, 2020
- Roland has been at PhillyCAM as Access Facilitator since 2018 and has worked in public access in some form or other for the past 14 years.
It’s been a bit since we made a PCAM blog so let’s just jump right back in and hope we aren’t too rusty! Today’s topic—getting better audio recordings at home.
Whether you’re recording a radio program, video, participating as a guest on someone else’s show, or just don’t want to be the one person on your work Zoom call that sounds like crud, here are some tips and tricks for getting better sound at home.
The Space: Trick one isn’t to rush out and buy hundreds of dollars of gear (even though I know that’s where my gear-obsessed mind often goes). Rather, let’s try to make do with what we have and see what we can do to improve our sound, without spending the big bucks. This sounds like an obvious one, but try to find a quiet room to do your recording/call from. You can have a $1000 mic but if you’re recording in a busy environment it still won’t sound good. Try cranking up the AC (or the heat if you’re reading this during the winter months) for an hour ahead of time so you can turn it off during the actual recording. Do a clap test in the room you’re in. Do you hear an echo bounce back at you? If you do, it’s time to try and find a less reverberant space. Real estate agents may love hardwood floors but they’re an audio quality killer! If you can’t change spaces, try reducing echo and outside noise by adding rugs, or even an old blanket across the floor. A sheet tacked up in a loose swoop from the ceiling can really help in this regard too.
Headphones: We know, so many of you prefer not to have headphones on while you’re being recorded, but they’re a big deal when it comes to getting better sound. Firstly, if you’re on a bi-directional call they prevent the sound coming from the other virtual guests from looping out your speakers and right back through your mic creating nasty feedback or weird squelchy sounds as the conferencing program tries to delete that feedback. As an extra bonus, many earbuds and headphones include a mic built into the chord which is almost always a big step up from your computer's built-in mic. In a blind test I once did with a bunch of filmmakers, the mic built into Apple’s wired earbuds actually beat out a $200 USB microphone for sound quality.
Phone Calls: Are you interviewing someone over the phone? Consider using a video call through Zoom, FaceTime or another conferencing app instead… even if you’re only going to use the audio. For one, being able to actually see each other can really help it feel more conversational and make the content better. And in our extensive testing, we’ve found that the sound quality from video conferencing services is always substantively better than phone calls.
Backups: Does your guest have shaky internet? Is the sound quality coming through the stream really hit or miss? If you’re creating content that you plan on editing later in a program like Audacity or Premiere consider this handy trick: once you’ve connected with your guest over Zoom/Streamyard etc and are ready to record, have your guest open up the Voice Memo app on their phone and hit record, then set their phone down close to them. Once the interview is done, have them share that recording with you through Google Drive/iCloud/Wetransfer etc. Then you have an audio recording you can cut into your program that isn’t at the mercy of the internet and its many shortcomings. It can add time to your editing process since that track needs to be faded in and out when your guest is talking, but it’s a great way to get a real bump in audio quality for your remote guests.

Stuff to Buy: If you’ve done all those things and are still hitting a wall with sound quality you can consider buying a better quality USB Microphone, or a USB Interface and XLR Microphone. The Samson Q2U is a terrific starter mic. It sounds good and it works with USB so you don’t need any other gear to get it going, but if you expand your setup later on it will also work with traditional XLR. You can also often find it in a kit with a boom arm, pop filter and more to really make a full setup. Looking to take it to the next level? Getting an audio interface is the next step. Check out Zoom’s portable audio recorders (different company than Zoom video conferencing BTW). They double as a USB interface but with the added versatility of being able to record to an SD card out in the field. If you think you might ever need to record more than two mics at a time, their Zoom PodTrak P4 has exceptional audio quality and a ton of great features for podcasting at a really amazing price. For XLR mics to pair with your interface, Rode's PodMic is a pro level dynamic broadcast mic that comes in at just $100.
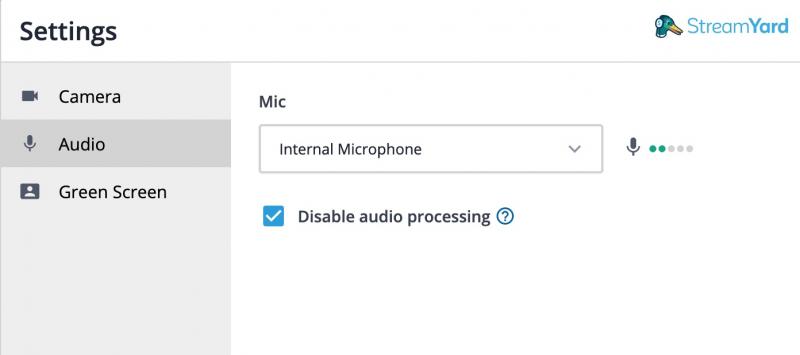
Bonus tips: If you’re working in Streamyard or Zoom you can actually turn OFF audio processing in the advanced settings. You have to be sure everyone’s using headphones and a decent mic, but if they are you can actually be better off without that processing which can often add to the squelchiness of the audio. In Zoom’s advanced settings you can also opt to record each participants audio as a separate channel that you can manipulate independently in your editing software. This is super powerful. You can fade participants down when they aren’t talking, apply specific noise reduction to a certain guest etc. Again, this adds significant time to your editing process, but if quality is your top concern it can be super useful.

Well, that's it for now. As always, feel free to reach out to us at techservices@phillycam.org for follow-ups and be sure to checkout out our other blog posts including a terrific 2-part guide to podcasting.
